
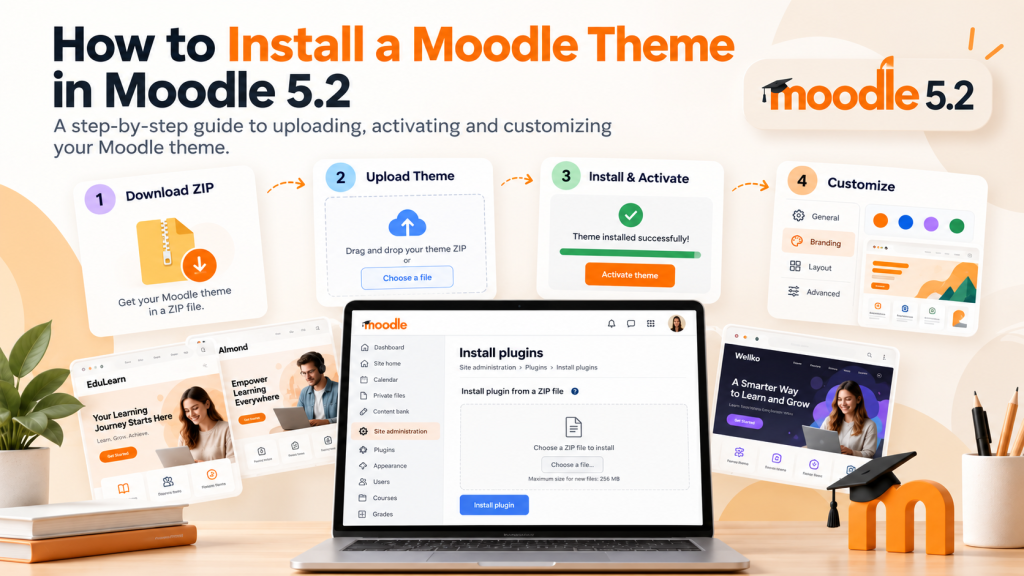
Installing a new Moodle theme is usually a straightforward process, but there are a few places where things can go wrong: downloading a theme built for the wrong Moodle version, uploading the wrong ZIP file, or installing the files into the wrong directory.
If you’re using Moodle 5.2, the safest approach is to check compatibility first, install the theme, complete Moodle’s plugin installation process, and only then switch your site to the new design.
This guide walks through the complete process.
Before You Install a Moodle Theme
A Moodle theme is technically a type of plugin, so Moodle handles its installation through the plugin system.
Before uploading anything, check three things.
1. Make Sure the Theme Supports Moodle 5.2
Don’t assume that a theme made for an older Moodle release will work correctly on Moodle 5.2.
Check the theme’s documentation or product page and confirm that your exact Moodle version is supported.
This matters especially on production sites. An incompatible theme can cause layout problems, missing functionality or, in some cases, prevent parts of Moodle from loading correctly.
Moodle’s own documentation recommends checking version compatibility before installing third-party plugins.
2. Back Up a Live Moodle Site
If you’re changing the theme on an active learning platform, create a backup before making major changes.
For an important production site, testing the theme on a staging copy first is even better.
A theme affects many parts of the interface, so check more than the homepage. Open a few courses, the Dashboard, login page, activities and mobile layouts before switching a busy site permanently.
3. Download the Correct ZIP Package
Most Moodle themes are distributed as ZIP files.
Keep the package compressed if you’re going to install it from the Moodle administration panel. Moodle will handle the package during installation.
If you’ve purchased or downloaded a package containing documentation, licenses, demo files and several ZIP archives, make sure you’re uploading the actual Moodle theme ZIP rather than the entire download package.
This is one of the easiest mistakes to make.
Method 1: Install a Moodle 5.2 Theme from the Admin Panel
For many Moodle installations, this is the simplest method.
You need administrator access, and your server must allow Moodle to write to the relevant plugin directory.
Step 1: Log In as an Administrator
Sign in to your Moodle site using an administrator account.
Then go to:
Site administration → Plugins → Install plugins
You’ll see an area where a plugin package can be uploaded.
Themes use Moodle’s plugin installation system, so this is also where you install a theme.
Step 2: Upload the Theme ZIP File
Drag your theme ZIP into the upload area or select it from your computer.
Moodle normally detects the plugin type automatically from the contents of the package.
For a Moodle theme, the plugin type should correspond to a theme.
If Moodle cannot recognize the package correctly, don’t force the installation without checking the ZIP structure first.
Step 3: Run the Plugin Validation
After uploading the ZIP, Moodle validates the package before installing it.
Pay attention to this screen.
Don’t simply click through warnings.
The validation process can reveal problems such as:
- an invalid plugin structure
- incorrect plugin information
- a destination problem
- permission issues
- compatibility problems
If validation fails, fix the underlying problem before trying to activate the theme.
Step 4: Continue the Installation
Once Moodle accepts the package, continue with the installation.
Moodle may send you through its normal upgrade or notification process because a new plugin has been detected.
Complete the required steps until Moodle confirms that the plugin installation has finished.
Installing the files alone isn’t always the final step. Moodle also needs to detect and register the new plugin.
Method 2: Install a Moodle Theme Manually
Sometimes the web installer isn’t available.
Your host may prevent Moodle from writing to its own application directories, or your server configuration may require plugin files to be deployed manually.
In that case, you can install the theme directly on the server.
Step 1: Extract the Theme
Unzip the theme package on your computer or server.
You should end up with a single theme directory.
For example, a theme named:
exampletheme
should normally have a structure similar to:
exampletheme/config.php
exampletheme/version.php
and the other theme files.
Be careful with nested folders.
A structure like:
exampletheme/exampletheme/version.php
may indicate that you’ve copied an unnecessary outer folder.
Step 2: Upload It to Moodle’s Theme Directory
Standard Moodle theme plugins belong inside:
/theme/
So your finished directory would look something like:
/path/to/moodle/theme/exampletheme/
Do not place a Moodle theme inside the blocks, mod or another plugin directory.
Moodle uses specific directories to identify different plugin types.
Step 3: Open Site Administration
After copying the files to the server, log back into Moodle as an administrator.
Visit:
Site administration → Notifications
Moodle should detect the new plugin and start the installation or upgrade process.
Follow the prompts until setup is complete.
How to Activate Your New Moodle Theme
Installing a theme doesn’t necessarily mean Moodle immediately starts using it.
Once installation is complete, go to:
Site administration → Appearance → Themes
Moodle 5.2 includes Boost and Classic as its standard themes, and any compatible third-party themes you’ve installed should also become available here.
Select the theme you want to use and apply it to the site.
After saving the change, open the Moodle homepage and a few internal pages to make sure the theme is being displayed correctly.
Internal link: Best Moodle 5.2 Themes for a Modern LMS in 2026
What to Check After Activating the Theme
Don’t stop at the homepage.
A theme can look perfect on the landing page while still revealing issues elsewhere.
Check at least the following areas.
Homepage
Look at:
- navigation
- header
- footer
- course sections
- front-page blocks
- calls to action
Pay attention to spacing at different screen widths.
Dashboard
Log in as a normal learner rather than only an administrator.
Make sure courses, blocks and navigation remain easy to use.
Course Pages
Open a course with real content.
Test:
- activities
- resources
- course sections
- completion indicators
- menus
- blocks
A good Moodle theme needs to work inside the LMS, not just on its marketing-facing pages.
Login Page
Check the login experience while logged out.
If the theme offers custom login-page settings, this is also a good time to configure them.
Mobile Layout
Reduce the browser width or test the site on a real phone.
Check that menus, buttons, course cards and text aren’t being clipped or forced outside the screen.
Responsive design is especially important for Moodle because learners may access the same course from very different devices.
Moodle Theme Installed but Not Showing?
This is one of the most common questions after a theme installation.
If installation completed successfully but the site still appears to use the old design, check the following.
Clear the Moodle Theme Cache
Moodle caches theme resources for performance.
That means changes aren’t always immediately visible.
Go to:
Site administration → Appearance → Themes
and use the option to clear theme caches.
You can also purge Moodle caches when necessary.
After clearing the cache, reload the page.
Check That You Actually Selected the New Theme
Installing and selecting are separate steps.
Return to:
Site administration → Appearance → Themes
and confirm that the new theme is active.
Check Course, Category or User Theme Overrides
Moodle can be configured to allow different themes for users, courses or categories.
If those options are enabled, the site theme you selected may be overridden in certain parts of Moodle.
This can make it appear as though the new theme only works on some pages.
Why Doesn’t Moodle Let Me Upload the Theme?
If the plugin installer isn’t available or Moodle reports that the destination directory isn’t writable, this is usually related to server configuration or permissions.
The web server needs sufficient access to deploy files through the web installer.
If your hosting environment intentionally prevents this, use the manual installation method instead.
Don’t solve a permissions problem by giving every Moodle directory unnecessarily broad write permissions. Server permissions should remain appropriate for your hosting environment.
If you aren’t comfortable changing them, ask your hosting provider or server administrator.
“Invalid Plugin” or ZIP Validation Errors
If Moodle rejects the theme package, start with the ZIP itself.
Check whether:
- the theme supports Moodle 5.2
- you downloaded the correct package
- the ZIP contains the actual theme
- its folder structure is correct
- the package wasn’t corrupted during download
- you’re accidentally uploading a complete product bundle rather than the installable theme
If you’re manually installing the files, also verify the directory name.
Moodle expects plugin names and directory names to follow the plugin’s defined structure. Renaming a theme folder arbitrarily can prevent it from being detected correctly.
Where Are Moodle Themes Stored?
In a standard Moodle installation, themes live inside the Moodle:
/theme/
directory.
For example:
/moodle/theme/boost/
/moodle/theme/classic/
and a third-party theme might appear as:
/moodle/theme/yourtheme/
You normally don’t need to work with this directory if you’re installing through Moodle’s admin interface, but knowing where themes belong is useful when troubleshooting or performing a manual installation.
Should You Remove Your Old Theme?
You don’t have to immediately delete your previous theme simply because you’ve installed a new one.
Keeping a known-working alternative temporarily can be useful while testing.
However, you also shouldn’t accumulate unused third-party themes indefinitely.
Every additional plugin is another component that needs to remain compatible, maintained and considered during future Moodle upgrades.
Once you’re confident you no longer need a third-party theme, you can review your installed plugins and remove it properly.
Installing an Almond Theme on Moodle 5.2
The same basic Moodle installation process applies when installing an Almond Themes product.
Before installation, make sure you’re using the package intended for your Moodle version.
Then:
- Log in as a Moodle administrator.
- Open Site administration → Plugins → Install plugins.
- Upload the installable theme ZIP.
- Review Moodle’s validation results.
- Complete the installation.
- Go to Site administration → Appearance → Themes.
- Select the newly installed theme.
- Configure its theme-specific settings.
- Clear theme caches if necessary.
- Test the site on desktop and mobile.
If you’re still deciding which design fits your project, see our Best Moodle 5.2 Themes for a Modern LMS in 2026 guide before installing one.
A Few Minutes of Checking Can Save Hours Later
Installing a Moodle theme doesn’t require rebuilding your LMS.
In most cases, you can upload the correct ZIP package, complete Moodle’s installation process and activate the theme from the Appearance settings.
The part worth spending time on is everything around those few clicks.
Confirm Moodle 5.2 compatibility first. Test important pages before switching a production site. Check the experience as a learner, not just as an administrator. And remember that Moodle’s theme cache can make a successful change look like it hasn’t worked yet.
Once the theme is installed correctly, you can move on to the more interesting part: adapting the site to your own brand, courses and learners.
Next guide: How to Customize Moodle 5.2 Without Coding
